Leave Your Message

How to Choose the Best Car Tent for Camping?

Choosing the best Car Tent begins with the vehicle, not the campsite photo. A compact hatchback needs different support than a large SUV. Measure the roof, check the manufacturer’s load rating, and include passengers, luggage, and mounting hardware. That detail is easy to overlook. It can become expensive later.

Jack Griffiths, founder of TentBox, has said, “A good roof tent should make camping simpler, not more complicated.” That principle should guide every comparison. Consider setup time, ladder stability, mattress thickness, ventilation, waterproof fabric, and the tent’s packed height. After a long drive, a five-minute setup can feel far better than a complicated design. Check the shell or fabric carefully. Weak zippers and thin seams may reveal poor long-term value.

Real camping also exposes small problems. A tent may feel spacious at home but cramped beside wet equipment. A tall vehicle may be difficult to access in strong wind. Some models perform well in summer yet provide limited insulation during cold nights. Think about your usual roads, weather, and camping frequency. Read independent reviews, inspect warranty terms, and confirm compatibility with your roof rack system. Do not trust attractive photographs alone.

The “best” Car Tent is rarely the most expensive model. It is the one that fits your vehicle, habits, and tolerance for setup work. You may still choose imperfectly. That is normal. A careful comparison reduces surprises and helps turn a crowded parking area into a practical sleeping space.

How to Choose the Best Car Tent for Camping?

Define trip type and occupancy with ISO 5912 tent classifications

Choosing a car tent starts with your trip, not its shape. ISO 5912 helps assess camping tents through safety and performance requirements. It is useful when comparing weather resistance, ventilation, structural stability, and fabric behavior.

Some ISO 5912 guidance separates tents by intended frequency of use. A lower grade usually suits occasional camping, such as one dry weekend near a maintained campsite. A higher grade is better for regular trips, changing weather, and repeated assembly. Check the product documentation carefully, because sellers may describe classifications differently. The standard does not magically decide whether two adults and a child will sleep comfortably. That remains a capacity question.

Count sleeping occupants, luggage, and the space needed to enter the vehicle safely. A two-person tent can feel cramped with thick sleeping bags and wet jackets. For three campers, consider a larger sleeping area or a separate vestibule. Measure your vehicle roof and confirm the tent’s supported load, ladder limits, and attachment method. Never rely on appearance alone.

On a windy evening, watch how the poles flex and how quickly rainwater leaves the roof. ISO testing offers valuable evidence, but real campsites are uneven and unpredictable. I once underestimated changing wind and packed too few guy lines. That mistake was avoidable. Look for clear test information, repair guidance, ventilation details, and stated occupancy before buying. A careful choice matches the classification to your actual camping habits.

How to Choose the Best Car Tent for Camping? - Define trip type and occupancy with ISO 5912 tent classifications

Match the tent to the planned frequency of use, expected weather exposure, number of occupants, and available vehicle space. ISO 5912 classifications describe the intended level of use; they do not determine the number of people a tent can accommodate.

Trip Type Typical Occupancy Suitable Car-Tent Configuration Relevant ISO 5912 Type Weather and Construction Priorities Selection Checklist
Short fair-weather trip
Occasional weekend or one-night camping
1–2 people Compact rooftop tent or vehicle-side shelter with a small sleeping area Type I
Lightweight tents intended for occasional use
Low packed weight, quick setup, adequate rain protection, secure guy lines, and a waterproof floor or sealed connection to the vehicle Check vehicle roof-load limits, packed dimensions, ladder reach, ventilation, and whether the tent includes a rainfly
Regular recreational camping
Several trips each season in generally moderate conditions
2–4 people Rooftop tent with an annex, or a freestanding ground tent connected to a vehicle awning Type II
Tents intended for general use
Stronger poles, durable fabric, taped or protected seams, effective cross-ventilation, and a full-coverage rainfly Confirm usable sleeping area rather than advertised capacity, door clearance, storage space, and compatibility with the vehicle’s mounting system
Frequent multi-day travel
Repeated camping trips, changing locations, and mixed weather
2–4 people Heavy-duty rooftop tent or robust vehicle-mounted shelter with a separate living annex Type III
Tents intended for frequent use
Durable high-use materials, reliable hardware, stronger anchoring, abrasion resistance, good airflow, and better protection against sustained rain and wind Inspect pole joints, hinges, zippers, ladder load rating, attachment points, repairability, and drying options after wet use
Extended stationary camping
Long stays at one campsite or seasonal outdoor accommodation
3–6 people Large vehicle awning room or spacious ground tent used alongside the vehicle; rooftop sleeping space may be separate Type IV
Tents intended for long-term use
High durability, stable anchoring, UV-resistant materials, generous ventilation, weatherproof storage, and comfortable standing or living space Verify campsite regulations, available footprint, drainage, storm tie-downs, interior height, and the time required for installation
Cold, wet, or windy conditions
Trips where weather protection is more important than minimum weight
1–4 people Weather-oriented rooftop or ground tent with a full rainfly, vestibule, and strong vehicle-side anchoring Select the ISO type according to frequency of use; classification alone does not guarantee severe-weather performance Full-coverage fly, bathtub-style floor, protected ventilation, storm guy points, suitable pole design, and correctly rated pegs Review the manufacturer’s tested weather limits, pitch the tent on suitable ground, and never rely on the vehicle as the only anchor in strong wind
Important planning note: Occupancy figures are practical planning ranges, not ISO 5912 requirements. Allow additional space for sleeping bags, clothing, cooking equipment, and ventilation. Always confirm the vehicle manufacturer’s roof-load limit, the tent’s maximum user load, and the installation instructions before use.

Verify roof load limits using vehicle manuals and dynamic-load ratings

How to Choose the Best Car Tent for Camping?

A car tent must match your vehicle’s roof limits, not just its sleeping capacity. Check the vehicle manual before comparing tent sizes. Look for the dynamic roof-load rating, which applies while driving. This figure includes the tent, roof rack, mounting hardware, and other cargo. A lightweight tent can still exceed the limit after adding these items. Do not rely on a seller’s general claims. Manuals matter more.

The parked, or static, load rating is different. It may be much higher because the vehicle is stationary. However, the roof, rack, and mounting points must still support the tent and every occupant. Add realistic body weights, bedding, water, and equipment. Leave a safety margin.

Tighten every fastener according to the rack instructions, then inspect the fit before leaving home. Small movement is a warning.

I learned this after packing too casually. The tent seemed secure, but the crossbars shifted slightly during a test drive. That was enough to stop and reconsider.

A level campsite also reduces uneven stress on the roof. Avoid opening the tent on unstable ground or in severe weather. Recheck the load after several trips, because bolts can loosen and components can wear. The correct choice is not always the largest tent. It is the one that fits the documented limits, the rack system, and your actual camping habits.

Compare rain protection with the 1,500 mm hydrostatic-head benchmark

How to Choose the Best Car Tent for Camping?

Rain protection starts with the hydrostatic head rating. A 1,500 mm rating means the fabric can resist a water column approximately 1.5 metres high in laboratory testing. It is a useful camping benchmark, not a universal guarantee. ISO 811:2018 describes hydrostatic-pressure testing for textile fabrics, but real storms add wind, seams, abrasion, and repeated folding.

For weekend trips, 1,500 mm can handle light to moderate rain when the tent is pitched correctly. Keep the fabric taut. Angle the vehicle away from prevailing wind. Seal or cover every seam, because a strong rating cannot repair poor construction. The European Environment Agency reports that heavy precipitation events are becoming more frequent in many regions, so weather planning matters more than a label alone. Conditions are changing.

I once trusted the headline rating and ignored the groundsheet. Water collected beneath the vehicle, then entered through a stressed corner. That mistake changed my checklist. Look for taped seams, protected zippers, a raised bathtub floor, and a rainfly that leaves space above the inner fabric. Also check whether the rating applies to the complete tent or only the main fabric. ISO 811 testing does not reproduce driving rain or human movement. A 1,500 mm tent may be adequate for fair-season camping, but exposed sites deserve stronger protection and careful setup.

How to Choose the Best Car Tent for Camping?

Compare rain protection with the 1,500 mm hydrostatic-head benchmark

Hydrostatic head measures the water pressure a fabric can resist before leakage begins. A rating of 1,500 mm is commonly used as a practical minimum reference for rain protection in camping shelters. Higher ratings provide more pressure reserve during prolonged or heavy rain, but seam sealing, construction, installation, and fabric aging also affect real-world performance.

Assess ventilation, wind resistance, and setup under ISO 5912 guidance

How to Choose the Best Car Tent for Camping?

A car tent should breathe well before it looks impressive. Under ISO 5912 guidance, inspect ventilation openings, mesh panels, and airflow paths. Openings should reduce condensation without exposing sleepers to rain. I prefer vents positioned high and opposite each other. Warm air escapes more effectively there. Still, no vent works well when luggage blocks it.

Wind resistance deserves a practical check. Look for strong poles, reinforced attachment points, dependable guy lines, and secure stakes. ISO 5912 testing can help assess stability and weather performance, but it does not make a tent storm-proof. Test evidence should identify conditions, not merely claim “all-weather” protection. I once trusted a tight-looking setup and ignored loose straps. The fabric flapped loudly all night.

Setup time also matters, especially after sunset or during rain. Practice attaching the tent beside the vehicle on dry ground. Check whether doors, vents, and rain covers remain usable when fully tensioned. A clear instruction sequence reduces mistakes, although instructions are sometimes too optimistic. I count every pole and fastening point before leaving home. The process takes minutes. That habit prevents awkward searching in darkness. Choose a design that remains stable when the vehicle moves slightly, while keeping exits clear and ventilation unobstructed.
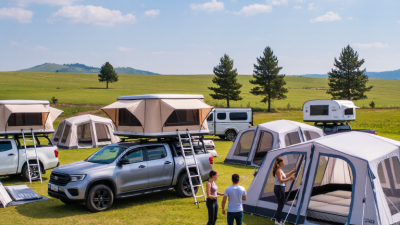
Rank packed size, weight, warranty, and total ownership cost

Choosing the best car tent starts with the size you will carry, not the size shown when opened. Measure your trunk, roof space, and storage shelf before comparing models. Packed dimensions should leave room for bedding and cooking equipment. Measure the trunk first. A bulky tent can turn a simple weekend trip into a frustrating loading exercise.

Weight affects setup, fuel use, and handling. I prefer a tent that two people can lift without straining, especially after rain. Check the packed weight, including poles, ladder, cover, and mounting hardware. Advertised figures sometimes exclude important parts. That mistake is common. For regular trips, a lighter tent may cost more initially but reduce transport effort and roof-load concerns.

Warranty details reveal more than a polished product description. Check coverage periods, excluded fabric damage, hardware support, and the process for replacement parts. A long warranty is less useful if shipping costs remain yours. Estimate total ownership cost over several seasons. Include storage bags, seam maintenance, replacement poles, installation equipment, and possible repairs. Keep receipts and inspect seams after each trip. I once focused too heavily on the lowest purchase price; the missing hardware created an unexpected expense. A careful cost sheet would have exposed that weakness before buying.